How to install Ubuntu 11.04 on external hard disk, showed how to install Ubuntu 11.04 on a portable USB hard drive. This tutorial, written for Ubuntu 11.10, takes it a step further by showing how to add an NTFS partition at the end of an external drive – after installing Ubuntu.
It is a very simple process, but if you a new to this, and need some hand-holding doing it, this tutorial should be all you need.
To start, you need to, if you have not already done so, download an installation image of Ubuntu 11.10 from here. And of course, you need an external USB drive attached to the computer that you are going to use. So, burn the image you downloaded to a CD and boot the computer from it.
Note: This tutorial was written for Ubuntu 11.10, but may also be used if you want to install Ubuntu 12.04 or any other Linux distribution based on Ubuntu Desktop to an external hard drive.
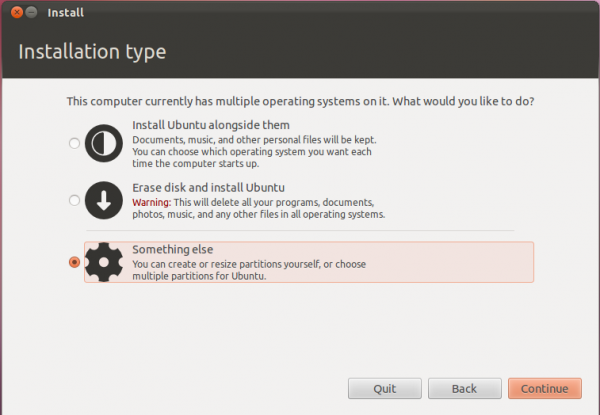
When the computer boots, you may start the installer prior to it booting into the Live desktop, or from the Live desktop. Click through the first few steps of the installer until you get to the step shown in the image below. Because installing Ubuntu on an external hard drive requires creating partitions manually, select the last option – Something else. Click Continue.
That will bring you to the Advanced partitioning tool. If, as the case with mine, the computer you are using for this installation has only one hard disk in it, the external hard disk should be listed as /dev/sdb. And if there are any existing partitions, they will be listed below it. Delete them: Select each one and click Delete.

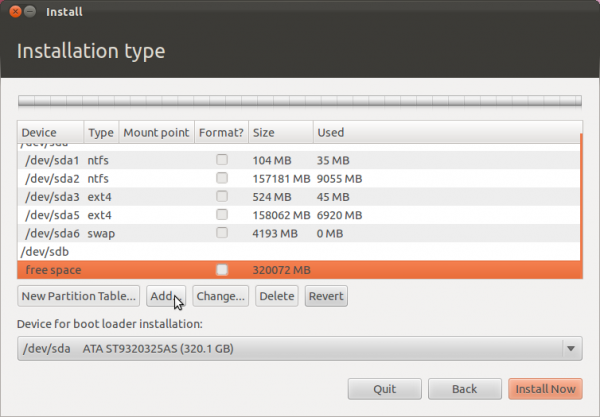
After the delete operation, the window should look just like the one below. Time to start partitioning the external hard drive. If you are new to disk partitioning in Linux, it is recommended that you read guide to disks and disk partitions in Linux. Manual disk partitioning guide for Ubuntu 11.04 is also recommended. Though written for Ubuntu 11.04, it is also useful for Ubuntu 11.10, because the installers are the same.
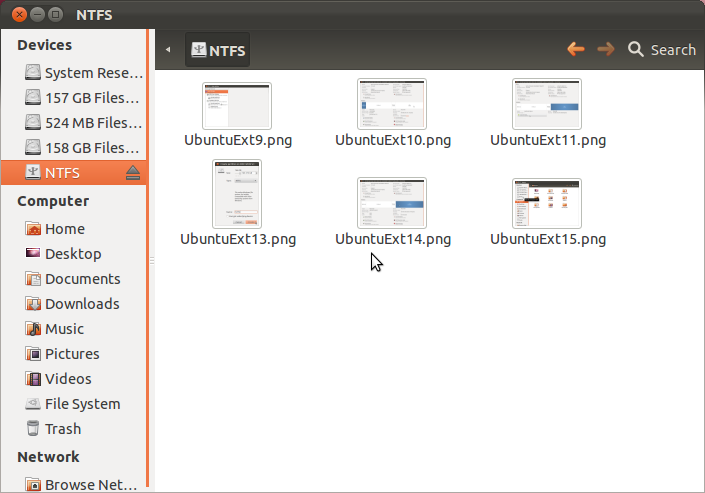
Objective: Create three partitions for Ubuntu. These will be for the boot partition, / (the root partition), and Swap. In the process, leave enough disk space at the end. That free space will be used to create the NTFS partition. That NTFS partition will be configured from Windows, so it helps if you have a Windows system.
To start creating partitions, select the free space of sdb and click Add.
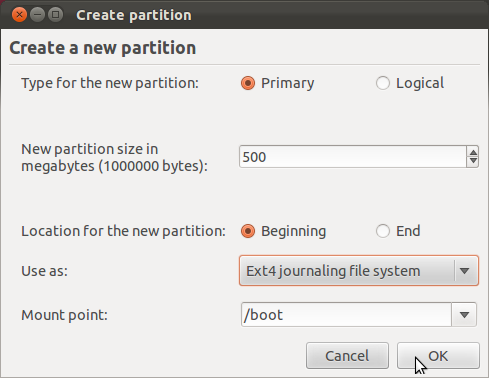
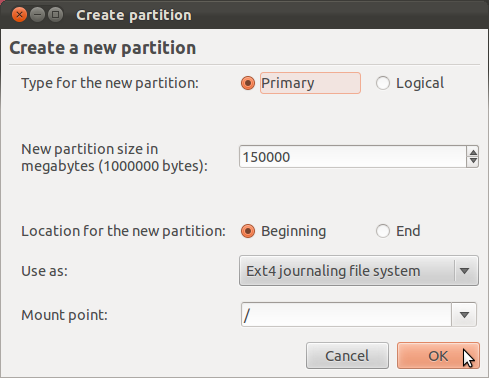
The first partition will the boot partition. A disk space of 500 MB is more than enough for this partition. Ext4 is the file system, and be sure to select /boot for the mount point. Note: For this tutorial, all three partitions will be created as primary partitions, but you may use the default, which creates the first partition as primary and the rest as logical partitions. Click OK.
For the second partition, which will be mounted at /, assign as much disk space as you want to use for Ubuntu. Ext4 is also the file system, though, you may use btrfs or any other supported file system. OK. For help with btrfs on Ubuntu, consider reading how to install Ubuntu 11.04 on a btrfs file system.
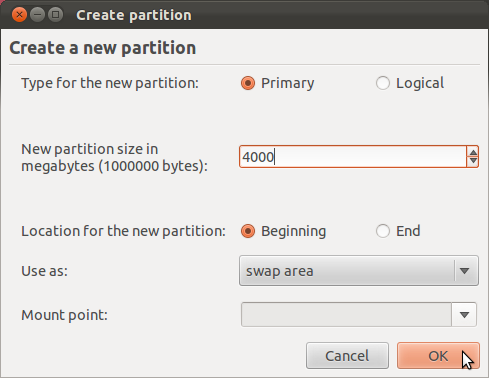
For the third and the last partition, for Swap, about 4 GB is good. Select “swap area” from the “Use as” dropdown menu. OK.
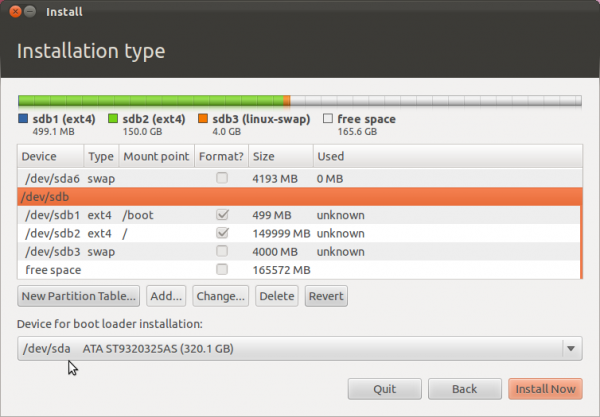
With all the partitions created, the advanced partitioning tool window should now look like this. Note the free space under sdb. That will be used for the NTFS partition. Because the installer will want to install GRUB, the boot loader, in the MBR of the internal hard drive, sda, the next task is to select sdb, the external hard drive, from the “Device for boot loader installation” dropdown menu.
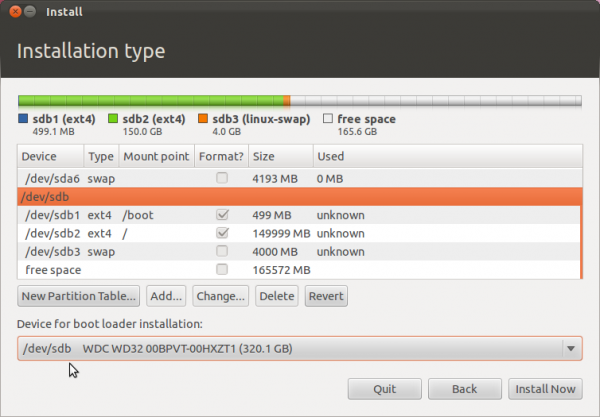
After making that change to the boot loader device, the window should look like this. Click Install Now to continue with the rest of the installation.
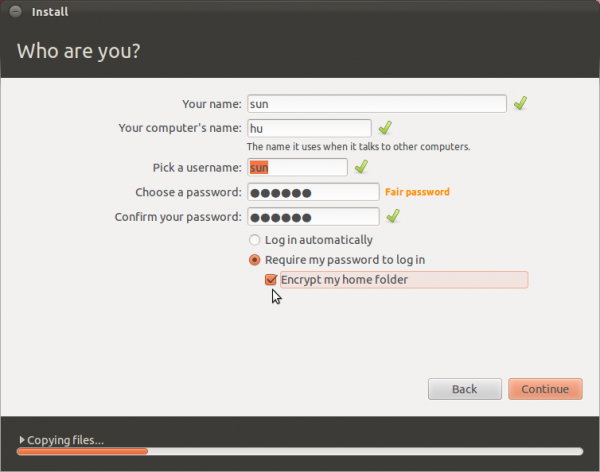
Though not required, at the step shown in the image below, you might want to enable the option to encrypt your home folder. That is the only feature of the installer that you can use to protect your data, if you lose the external drive or if it is stolen.


Can the additional Free space after completion of partition for Ubuntu be used as external storage to store files?
Not external storage, since it’s still part of the internal drive, but you can create a partition from it to store files in.
I followed these instructions using Ubuntu 12.04 LTS on a Windows 8 (upgraded from 7) system to my external HDD. The install goes fine, but when it tries to reboot after it, it just goes to a black screen and never makes it to a menu at all, like it isn’t actually booting. I tried reformatting the external and installing Ubuntu again, but it was to no avail. I’m using the x64 version since that’s the version of windows 8 my system runs, I figured the safest bet was to stick to that, and on the download page for Ubuntu it says to use 64 for any windows 8 systems.
If you can help in any way, it would be appreciated
it’s most probably this bug: https://bugs.launchpad.net/ubuntu/+source/grub-installer/+bug/384633