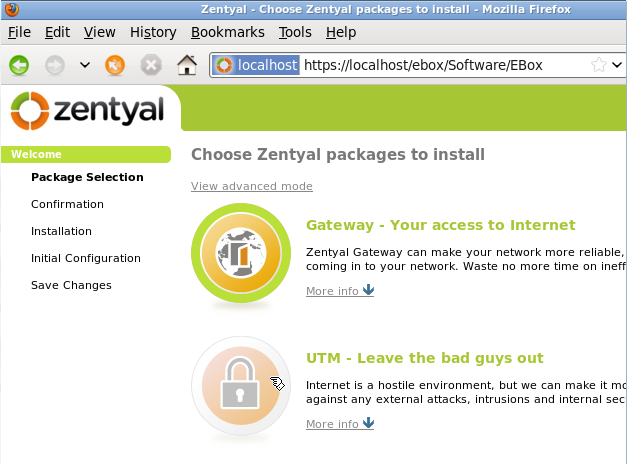
![]() Zentyal, the Linux distribution formerly known as eBox Platform, is a server distribution which can be used as a network gateway, unified threat manager, office server, infrastructure manager, and a unified communications server. The latest release, the first under the Zentyal name, is based on Ubuntu server 10.04. For installing the base system, it uses the same installation program as Ubuntu server.
Zentyal, the Linux distribution formerly known as eBox Platform, is a server distribution which can be used as a network gateway, unified threat manager, office server, infrastructure manager, and a unified communications server. The latest release, the first under the Zentyal name, is based on Ubuntu server 10.04. For installing the base system, it uses the same installation program as Ubuntu server.
Zentyal’s default installation uses an LVM-based disk partitioning scheme. The installer creates just two logical volumes and allocates all the available disk space to both. Though LVM, the Linux Logical Volume Manager, is the recommended mode of disk partitioning for both server and desktop systems, Zentyal’s use of LVM is not optimal.
This tutorial provides a step by step on how to configure LVM properly for a server installation. Not just plain old LVM, but an encrypted LVM. Encrypted LVM, or full disk encryption in general, is one method that you can use to enhance the physical security rating of your server.
To start, boot up your server with the installation CD, and select Install Zentyal 2.0 (expert mode). Enter.
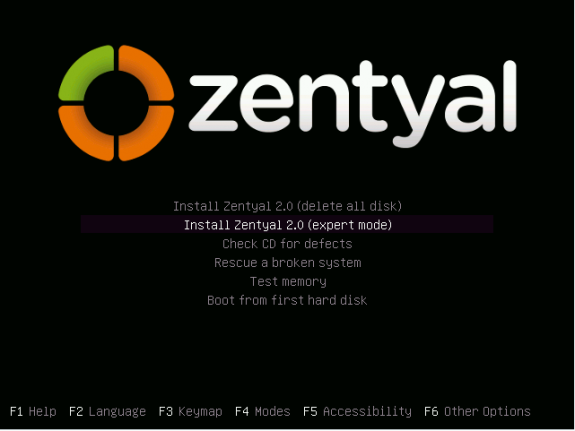
Zentyal installation options
To reduce the number of images used in this tutorial, images from the next seven steps have been omitted. Those images are for the following steps: Language selection, country, keyboard detection, keyboard origin, keyboard layout, hostname setting, and time zone confirmation. The next image is from step nine of the installation process, and it is where the disk partitioning starts.
Select Manual. Enter.
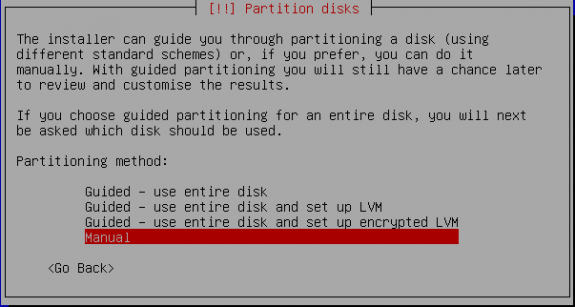
Select manual partition
These screenshots were taken in a virtual environment, so the disk space is not what you would have on a real hardware. In any case, to create the first partition, select the free space as shown. Enter.
Note: For this custom LVM installation scheme, we are going to create a separate /boot partition, and an encrypted Physical Volume from the remaining disk space. The Volume Group created from this will have six Logical Volumes, one each for the following file systems: /, swap, /usr, /var, /tmp and /home.
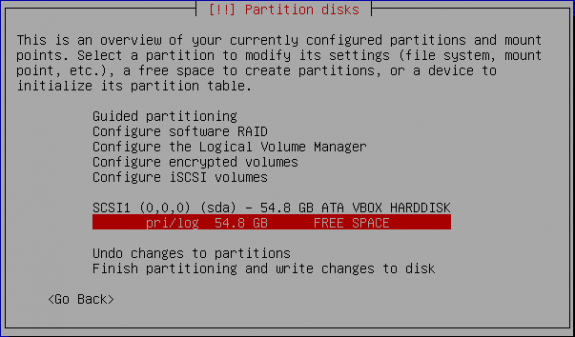
Select free space
Select the default, Create a new partition. Enter.
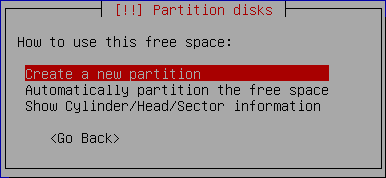
Create partition
Specify the partition’s size. Since this is going to be the partition for /boot, 500 MB should be more than enough. Enter.

Specify partition's size
Go with the default. Enter.
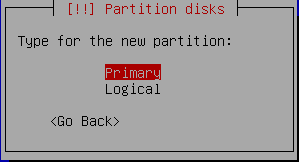
Primary partition
Again, the default is it. Enter.
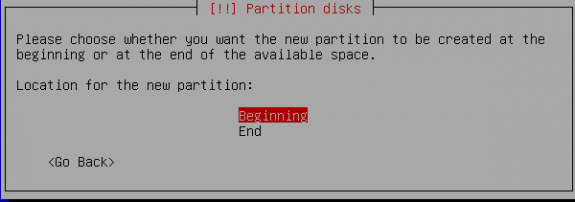
Select the default
On this screen, tab to Use as, and specify Ext4 journaling file system. This is the default on virtually all Linux distributions. Other journaling file systems available are ext3, reiserfs, jfs and xfs. Tab to Mount point, and specify /boot, then tab to Done setting up this partition. Enter.

Configure partition
With the boot partition created, now is the time to create the Physical Volume. Select the unallocated space. Enter. On the window that comes up, stick with the default – Create a new partition. Enter. The next window that comes up is where the size is specified.
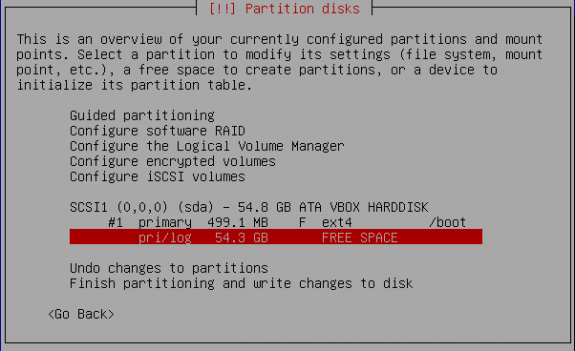
Select free space to create the physical volume


If not possible to avoid crypt pass request… How to unencrypt without installing the whole system again?
Is it possible to automatically assign the encryption pass so it is not requested every time the server is started?
Could you kindly provide a working configuration scenario for port forwarding in zentyal?
i cant use my webserver behind the zentyal server even after configuring port forwarding on eth2 (WAN) to be forwarded to webserver local IP.
Any idea!